In the previous four installments in this DIY series about How To Update the Family Bowrider, we outlined the rationale behind the project (see PBC 32-4), we replaced the old two-stroke outboard with a new four-stroke (see PBC 32-5); we added a watersports tow tower (see PBC 33-1), and sourced an appropriately sized used boat trailer (see PBC 33-2). In this issue we take on the task of updating the original (and now very old) electronics on our project boat – a 1998 SeaSwirl 208 21’ bowrider.
The original electronics on the boat worked, well sort of worked. They powered up, that’s a start! The radio was a cassette player with a manual turning knob to dial in the station, it had no antenna so all we could get was two local stations, and the pair of paper-based speakers had seen – and heard – better days. The fishfinder was black and white with a small screen and kept dropping the signal from the transducer. Since I couldn’t use it to find the fish reliably, my kids used it to tell them the temperature of the water. It was time to upgrade.
What Are You Dealing With?
I suggest you begin the electronics upgrade on your boat by taking a really detailed inventory of what you’re dealing with. Dream about anything you want, but if there isn’t space to install it, or no way to run the cables, it remains a dream and not a reality.
I pulled the old speakers out from under the helm and companion seat, measured the mounting holes, looked to see if there was room to make them bigger (for potentially a larger diameter speaker) and by how much, and inspected the existing wiring and where it ran though. Pulling new wire under an inaccessible floor is near impossible, even with a “fish”, and with a walk through to the bow, there was no way to go above, meaning under the dash. If you’re in this situation, your only option is to consider going around the boat from where the new stereo will be mounted to the new speaker locations. Check this out and plan your wiring, maybe even do the wiring before you order new electronics. Fortunately the existing wiring was in great shape, so I planned to only replace the connectors.
Next, armed with a good flashlight, I climbed under the helm and inspected the ‘rats nest’ of wiring with a view to understanding what was there. You’ll typically find three main groups of wires: 1) all the wires from the engine to your gauges, b) the power/positive and negative/ground wires from a terminal strip to the accessories (stereo and fishfinder in our case), and c) wires from the accessories to their attachments (the speakers and the transducer in our case). If you’ve never done this before, referring to the chart of typical wire colour codes will help you figure out what wire goes where and for what. Do not remove anything until you’ve labelled it. This is a two person job where you ask an assistant to turn on each accessory one at a time, and then you remove the wire that you think powers that accessory and see if you’re right. When you are, use masking tape and label the wires accordingly. Trust me, you won’t remember. Repeat for every accessory/wire. When everything is labelled, disconnect the battery. Then cut the wires you need to and remove the old electronics, but don’t discard them quite yet as you may need to refer to them. Now is a good time to clean up, and tie up with zip ties, the remaining wiring so it is neat and out of your way. We had already replaced our twenty year old gauges when we upgraded to the Suzuki 150hp outboard, so the wiring under the dash was already in pretty good shape – clean and neatly organized.
Maintain Wiring Standards for Safety
There are ABYC guidelines for marine wiring, and it’s beyond the space in this article to provide a lesson in 12V DC wiring basics. Suffice it to say that you’re best to remove all the old “aftermarket” wiring job, and strip your boat right back to the factory original wiring. The difference will be easy to tell. Beginning from there, use ONLY twisted wire (solid wire can break over time causing a short and a fire) and AWG Boat Cable (available at most Marina’s and Chandlery’s) to rewire your new accessories. (SAE wire is smaller than AWG boat cable and could add additional resistance and unsafe heat buildup.) Ideally, you’ll also use heat-shrink and an appropriate sized connectors installed with a proper crimping tool.
Go Shopping
Armed with your wish list and your boats idiosyncratic limitations, it’s time to go shopping at the myriad of aftermarket stores and websites. Make sure you choose a marine rated electronic – that includes inverters, battery chargers, stereos, speakers, lights and anything else you can think of. The constant damp environment will corrode anything else in less than a season and you’ll throw your new electronic out.
Installing Tips – Chartplotter
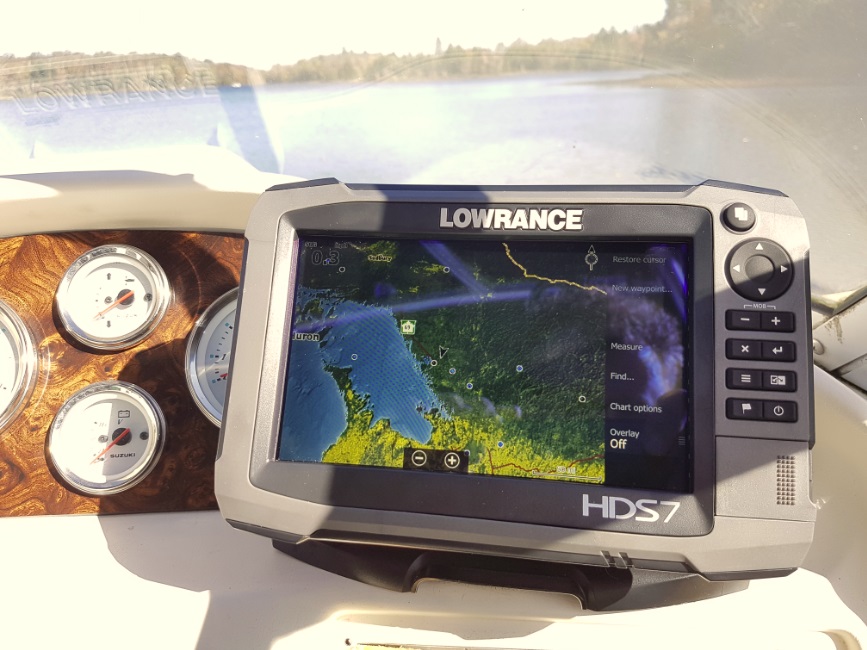
We choose a Lowrance HDS-7 Gen3 chartplotter/fishfinder for all of its’ features, the price point, and because it was the largest full colour display that would fit into the space we had on the helm. I also liked the internal GPS antenna as was one less thing to install. We also choose the accompanying TotalScan transducer (that offers Broadband and CHIRP sonar with StructureScan® HD and DownScan Imaging™ technology). The transducer needs to be mounted to the transom away from prop wash, and underwater so it will work even while on plane. With the boat on the trailer, I removed the old transducer, and following the Lowrance instructions and the handy supplied template for the transom mount, drilled 1/8” holes into the fiberglass and transom and filled them (and the old transducer holes) with 3M 4200 sealant, and screwed in the supplied stainless screws. Do this on a warm day so the 4200 is more workable, and let it cure before relaunching your boat. I ran the transducer cable up the outside of the transom, in through the wiring boot, up the starboard side behind the upholstery (a 2 person job) to the underside of the helm, out through the dash, and plugged it into the back of the HDS display. Next I ran the Lowrance supplied power cable in through the same hole in the dash (double check you’ve done this right), and connected it with the appropriate crimp connectors to the ground and switched power leads. Then I connected it to the back of the display unit itself. The instructions in the Lowrance installation manual were detailed and simple to follow, as were the instructions in the User Manual. I love the full colour display, the split screens, and the refresh rate on the HDS-7, as well as the option to use the touchscreen or the large buttons to navigate through the menus. We got about half of our lake charted out last summer so the fun continues this year.
Installing Tips – Stereo
We choose a Fusion MS-RA205 True-Marine stereo for several reasons. First it’s compact  and it fit where the old stereo came out of. Second, its’ large display and control were easy to use. Third, it offered AM / FM / USB / iPod / iPhone / MTP / AUX / USB and Bluetooth with the MS-BT200 remote receiver. We matched that to a pair of Fusion Signature Series marine speakers with LED lights and CURV cone technology, and powered them – and the two speakers on the Monster Tower – with a Fusion Signature SG-DA41400 4-channel 1400 Watts marine amplifier.
I took the time to carefully read the specs and matched the stereos output to the amplifier to the boat speakers (Zone 1 on the Fusion MS-RA205) and the tower speakers (Zone 2). Under or over powering your speakers never results in a sound quality that you’ll appreciate. Next, we choose 14 gauge speaker wire which was a little more than needed but came on a large roll and was less expensive that way.
Installation has several steps. First, find a place to install the Amplifier where it’s cool and dry, and where you can get power to it easily from the battery – this likely involves running a dedicated wire. We installed it under the helm and ran power up the starboard side alongside the transducer wire. If there is an inline fuse, install it close to the amp where you can access it easily if it trips, using crimp butt connectors. Second, run the speaker wires from each of the four speakers to the amp and connect to the appropriate speaker output according to the wiring diagram in the Fusion amp installation manual using ring terminals and your crimp tool. A loose connection will produce a scratchy audio output. We used a fish to pull the 14 gauge speaker wire from the two speakers on the Monster Tower through before we assembled the tower (it’s so much easier that way), ran the wires up the starboard side to the amp, and reused the original speaker wires from the two old speakers. Finally, run the speaker output wires from the stereo unit to the amp, and connect with ring terminals and your crimping tool. Take the time to measure each wire, cut to the appropriate length (with a little extra), crimp on the correct sized marine connectors, and route the wiring so it’s nice and neat under the dash, and tie everything up with zip ties. The last thing we did was place the Bluetooth receiver on the dash, route the wire in behind and plug it into the Fusion stereo.
Final Testing
Once everything is in place, and all your wires are neatly zip-tied up and out of the way so they can’t be caught or ripped out by gear stuffed into the space, install the inline fuses and test your new Fusion sound system. Make sure the left and right balance is correct, and that the forward and aft fade is correct. (Don’t laugh – lying on your back wiring over your head it’s easy to confuse wires and directions.) Of course, it’s best to do this using your favourite song played through your phone to the Bluetooth receiver and cranked up loud while you enjoy a cold beverage from your Muskoka chair on the dock! Then relaunch your boat and test your new Lowrance chartplotter / fishfinder. The myriad of screens and split-screens and ways to arrange them, and the sheer amount of data that the Lowrance HDS-7 offers will take me a long time to test out – in fact my early mornings are booked for at least the next two full summers as I continue to test the system!
In our next and final installment of this DIY series we will add the finishing touches: a new tonneau cover and a complete fiberglass finish that will last for years!
Sources:
Stereo, speakers, amp – www.fusionentertainment.com/
Fishfinder – www.lowrance.com/
Wakeboard Tower, speakers – www.monstertower.com
Connectors, crimping tool – Marine Chandlery or Electronics Supply